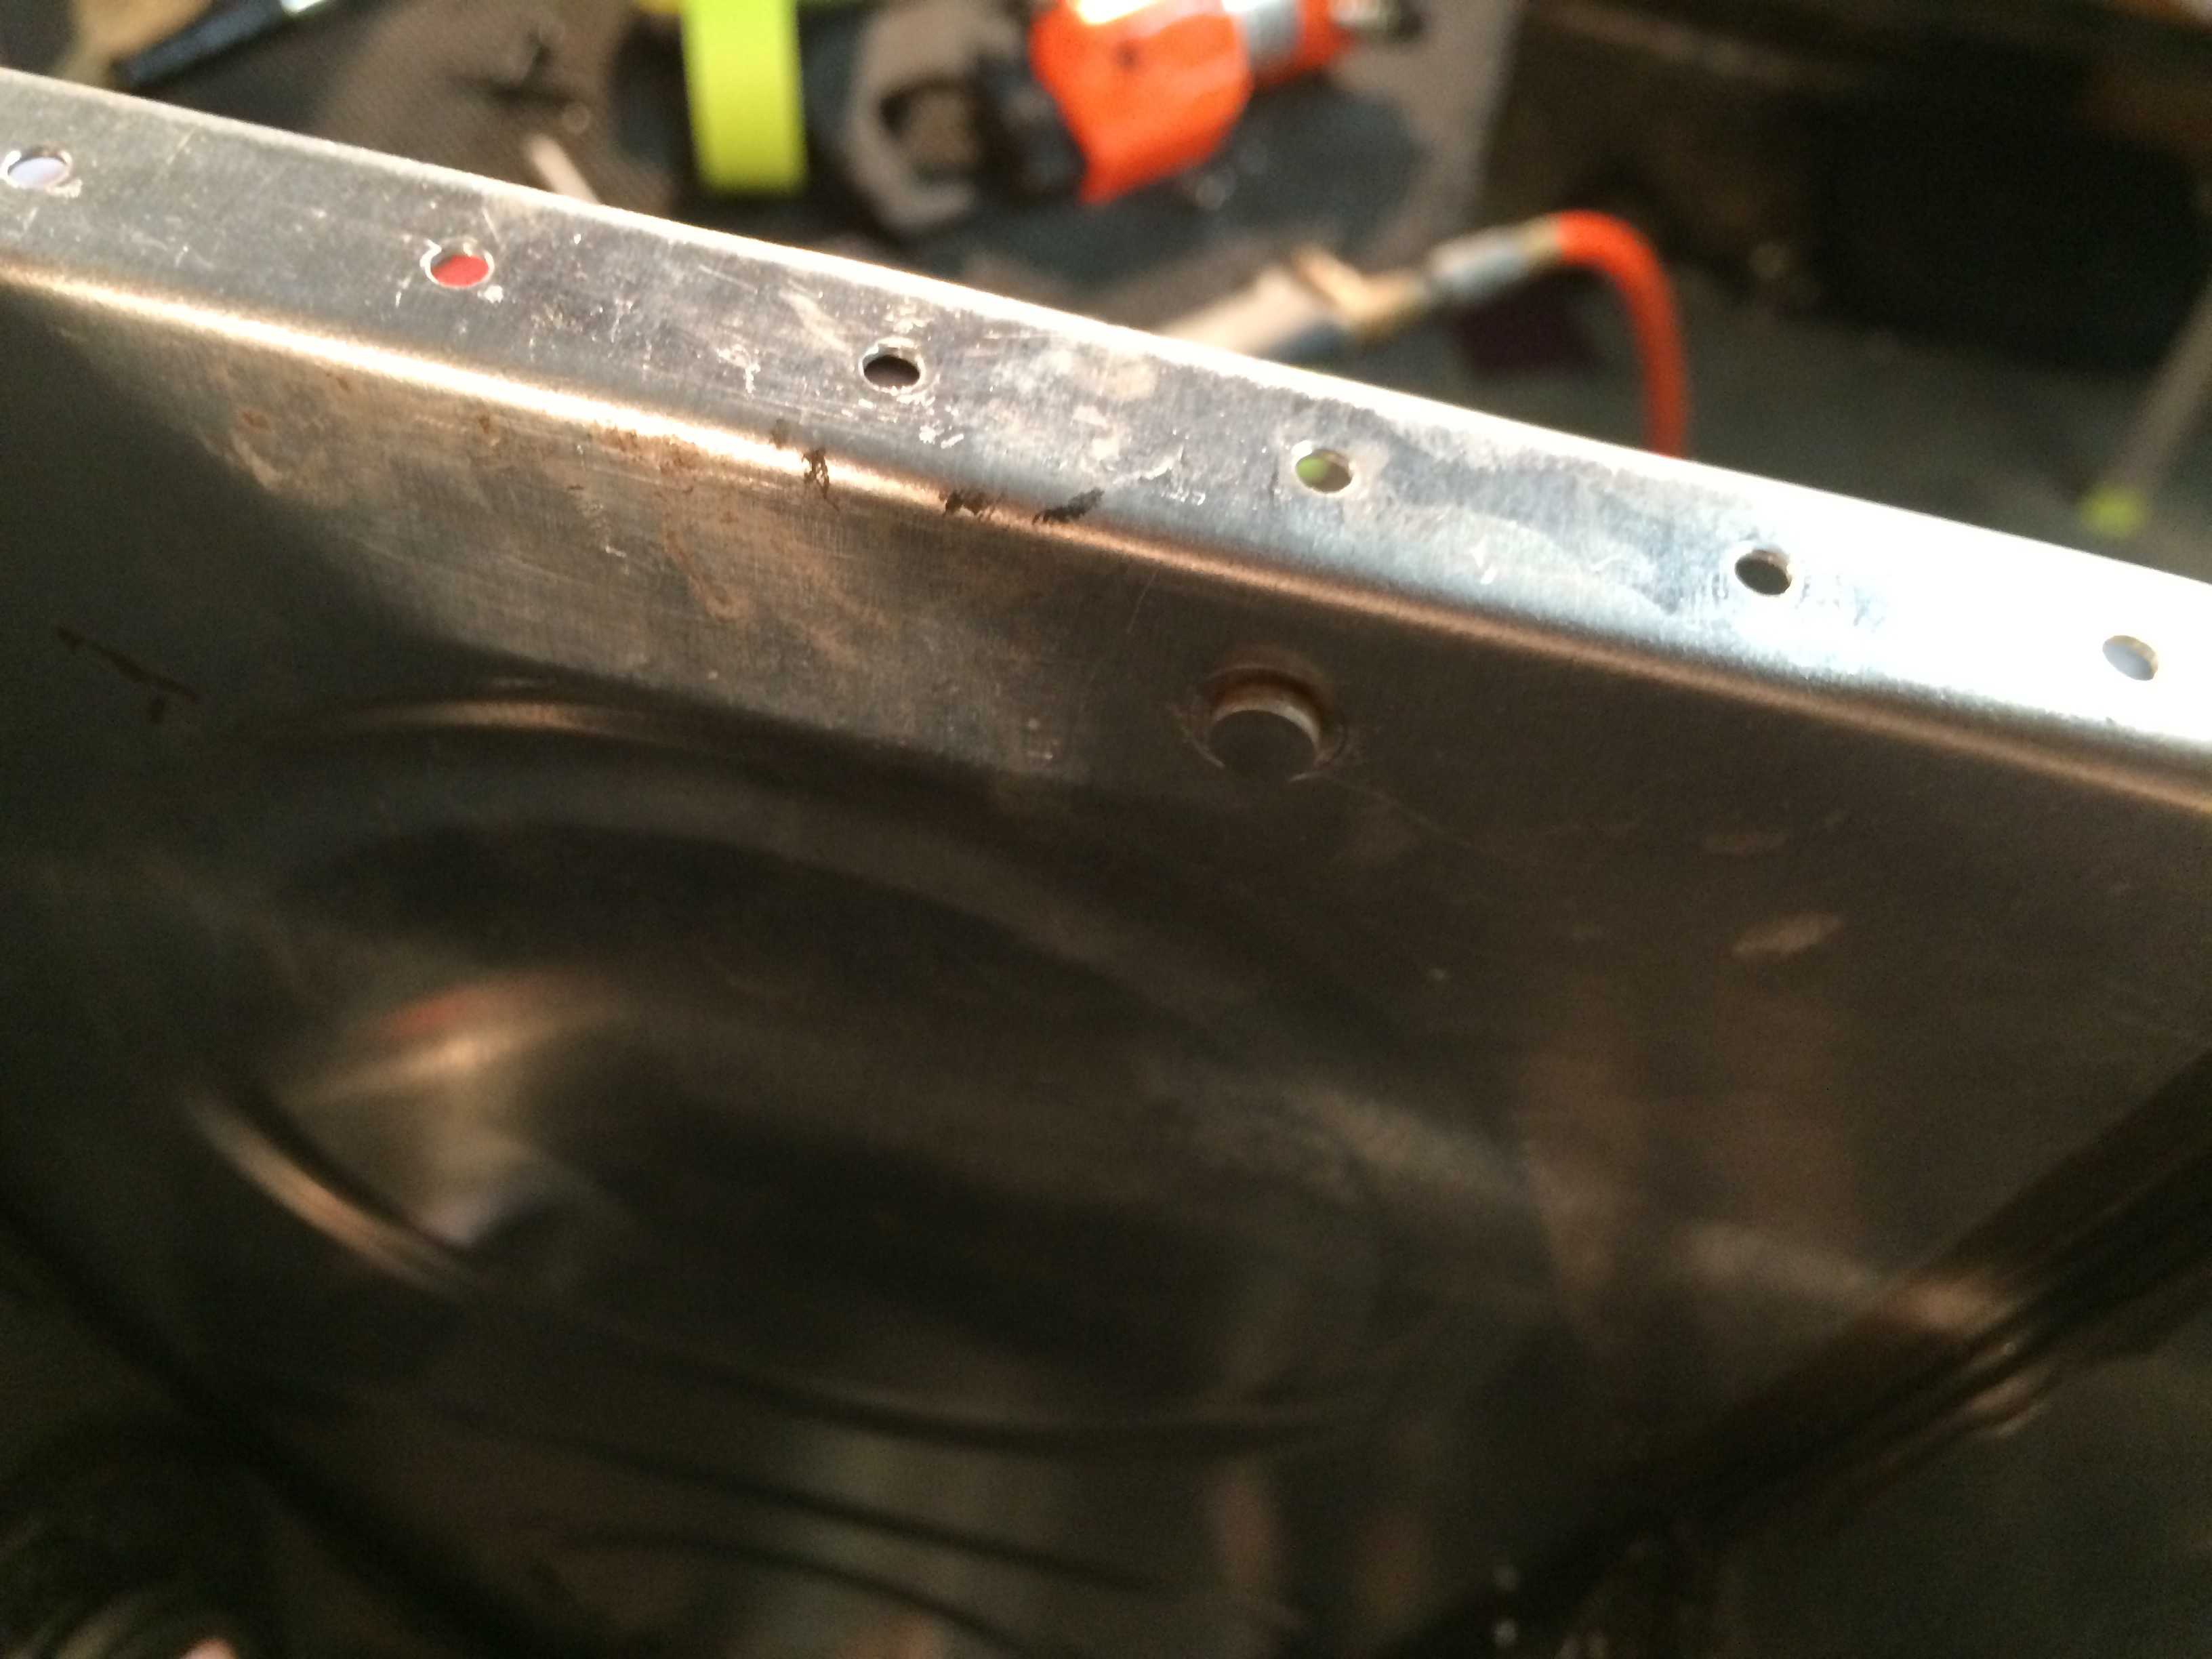
I countersunk the holes that will mount the fuel level sensor nut plates.
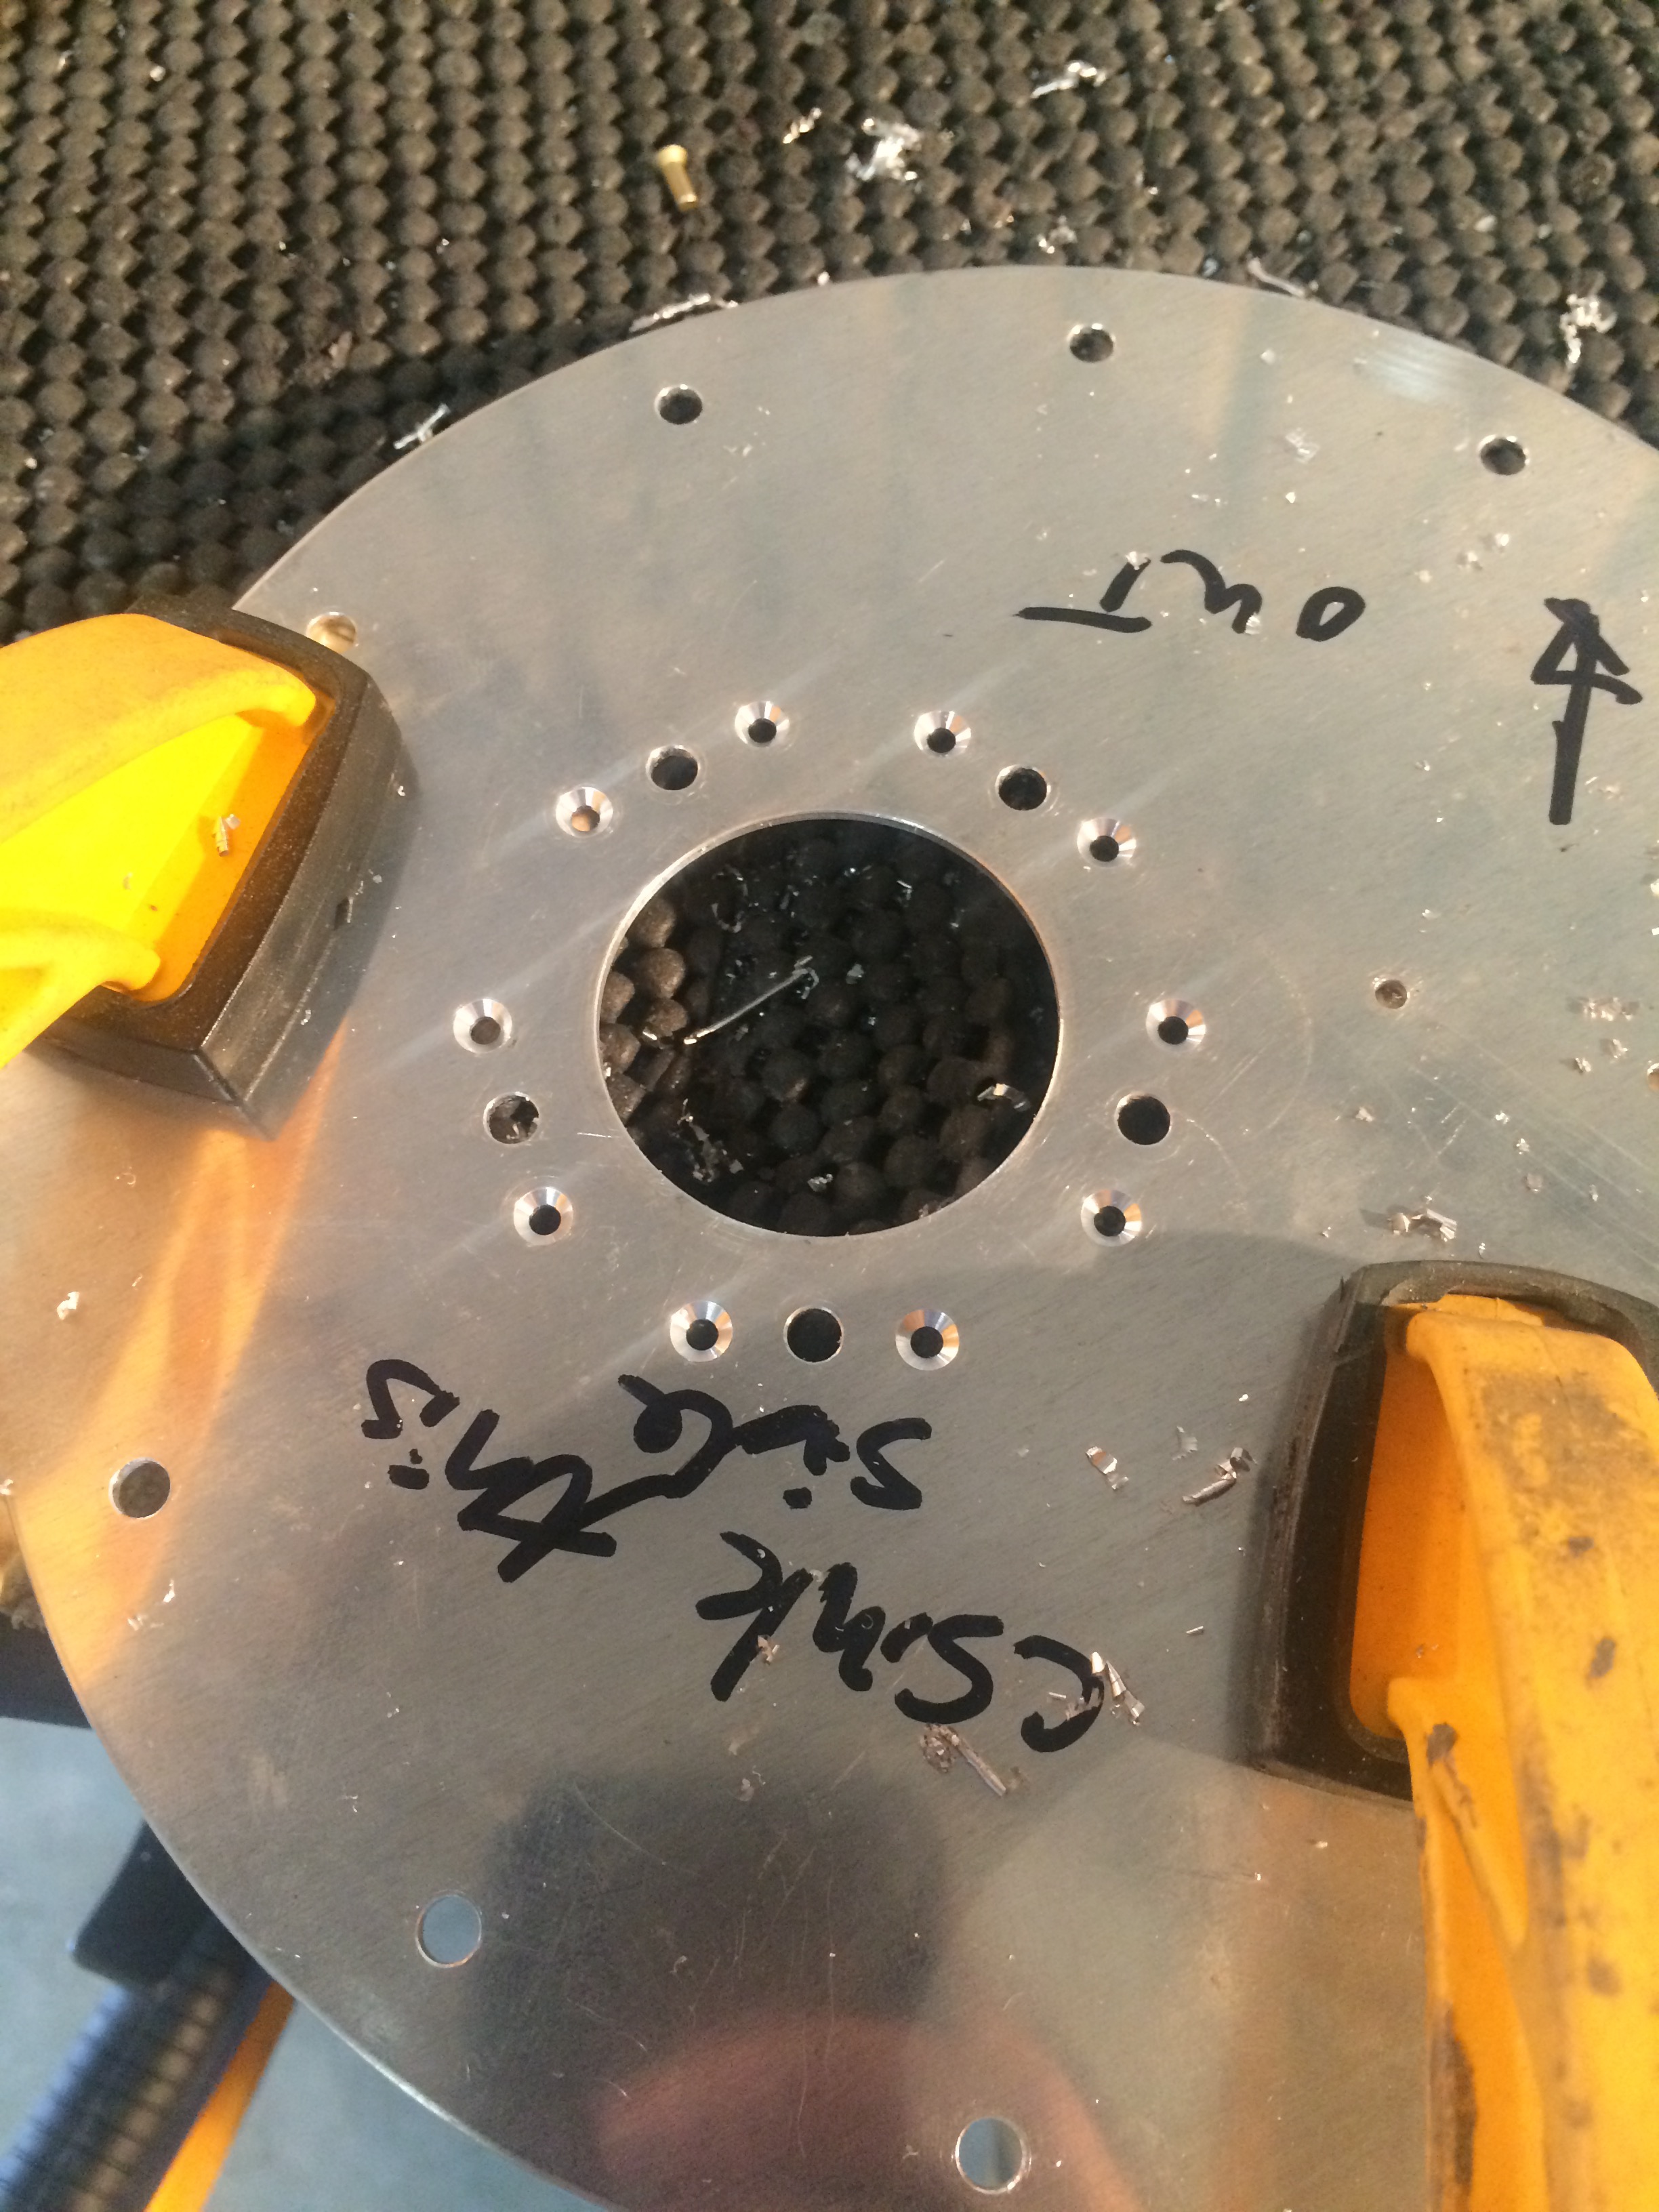
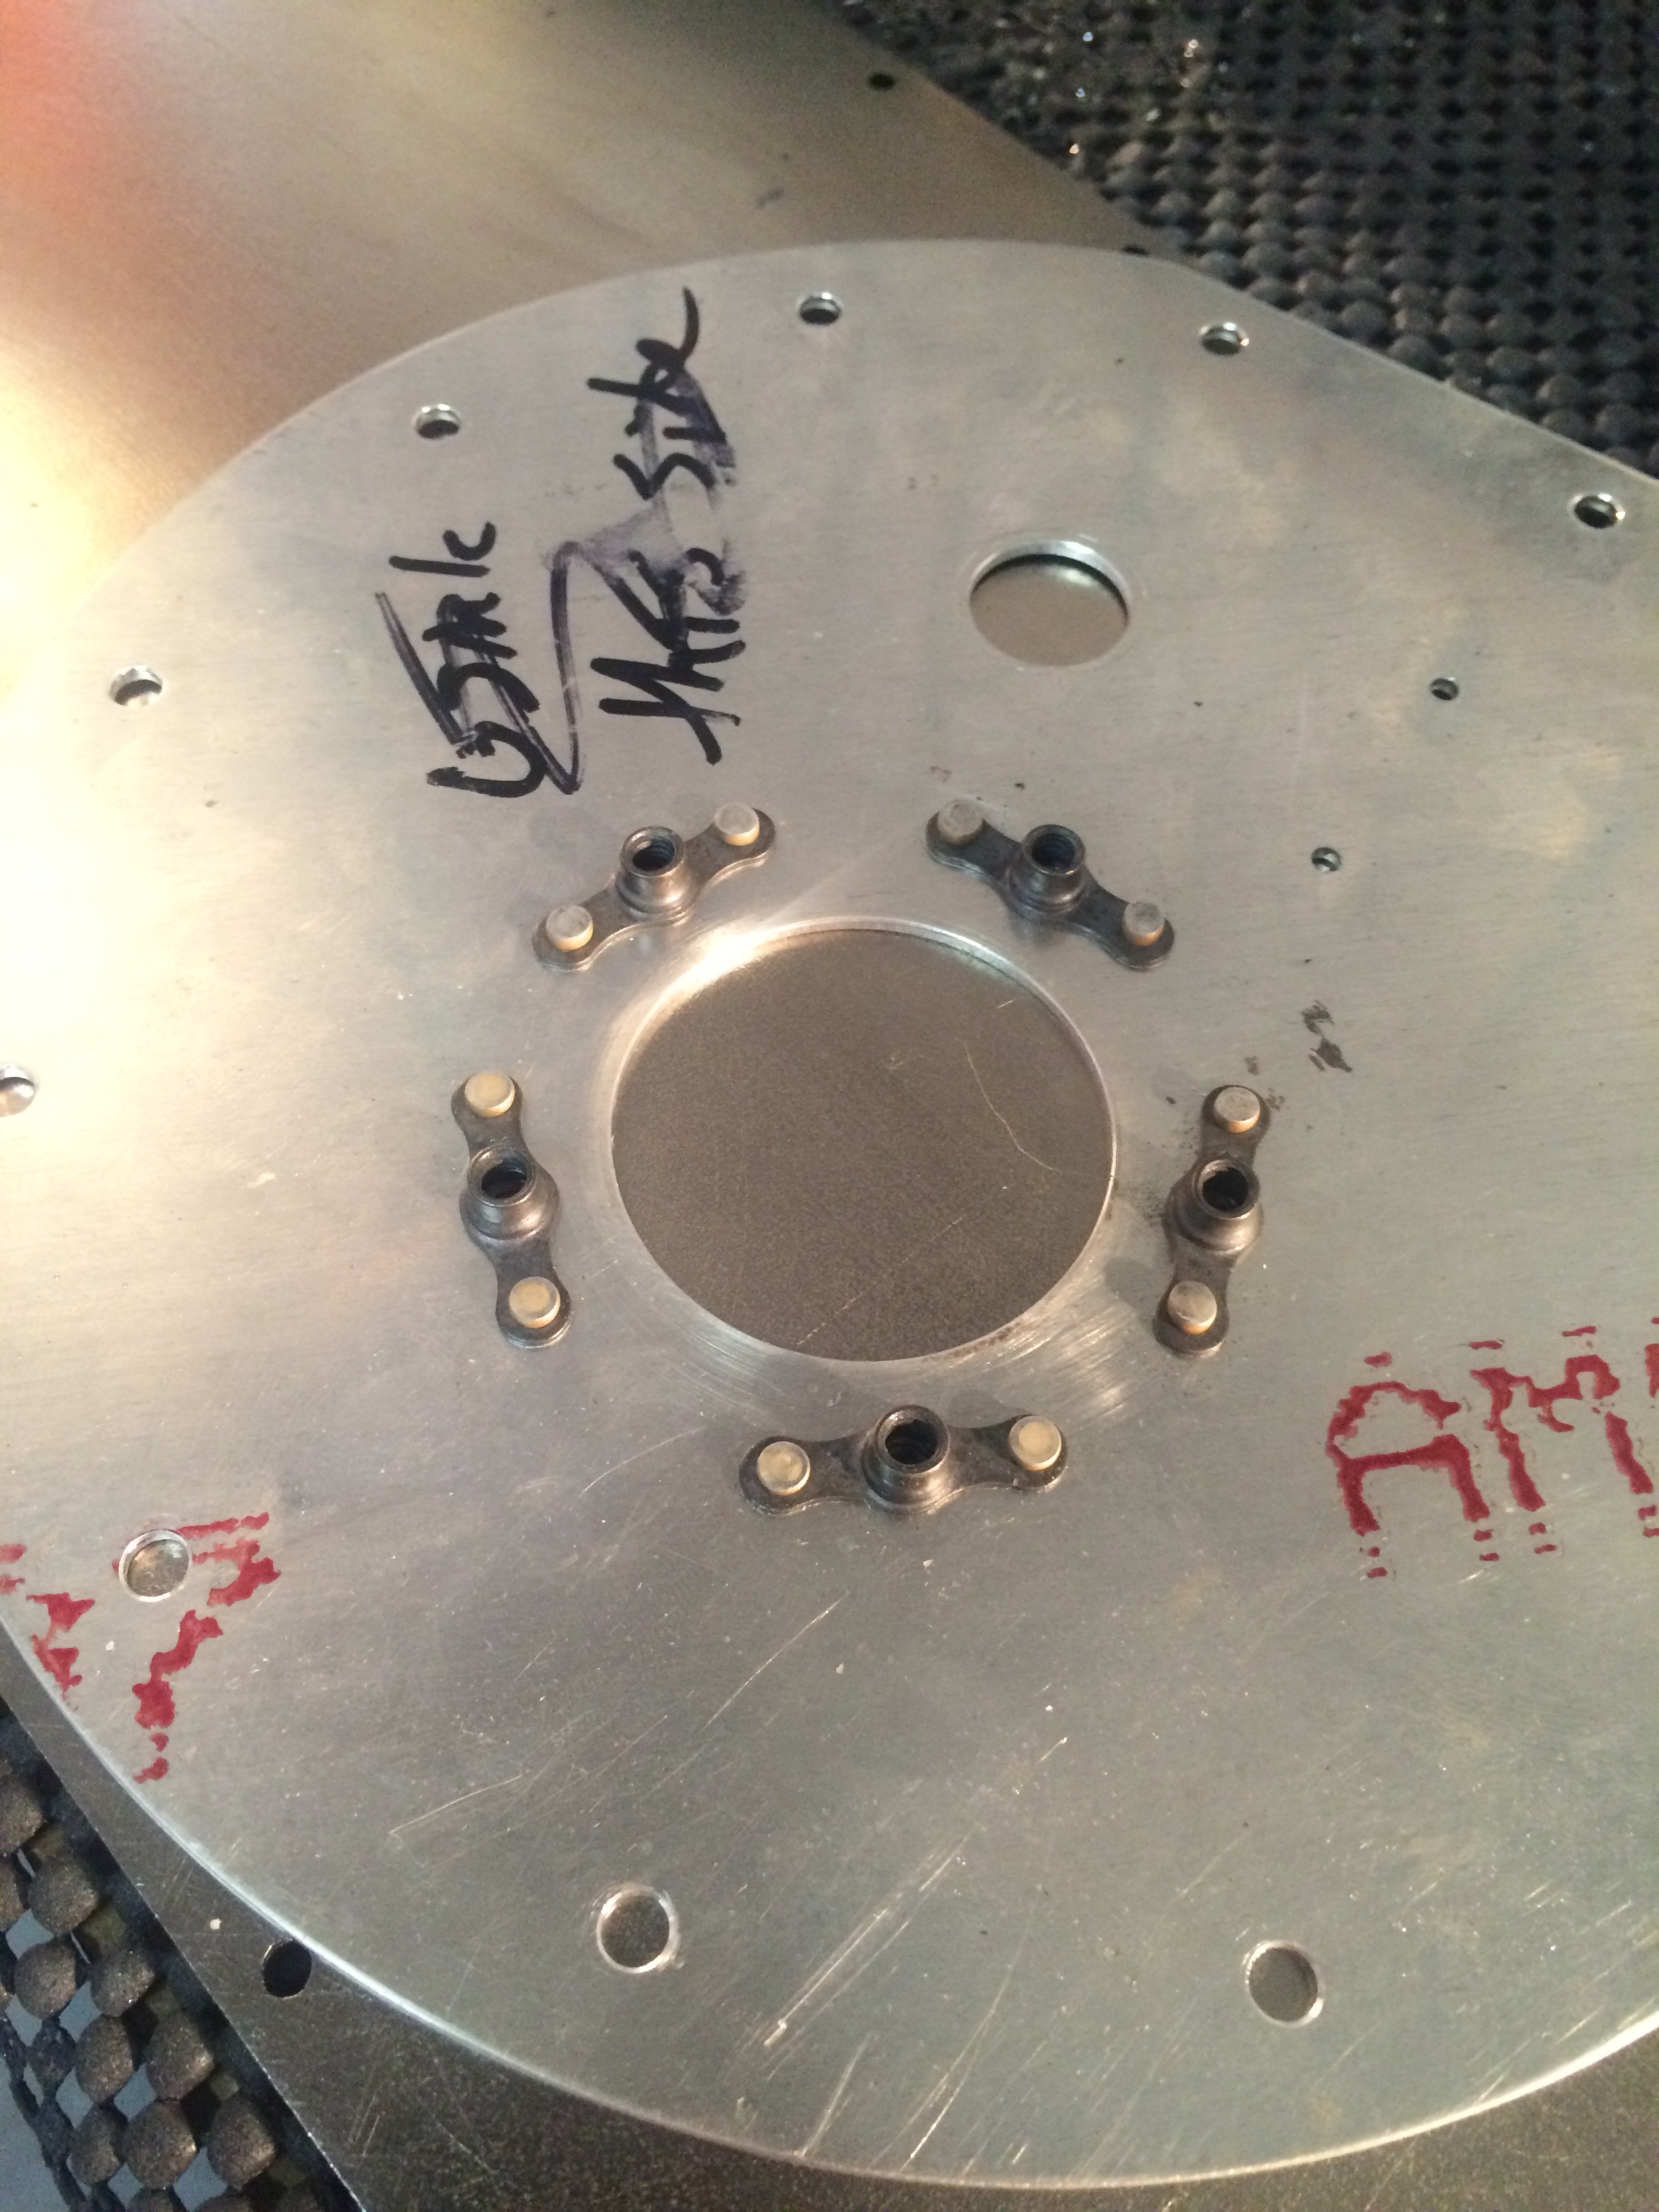
Here are the installed nut plates. I started setting the rivets with my pneumatic squeezer, but I switched to back riveting because it produces a much cleaner finish.
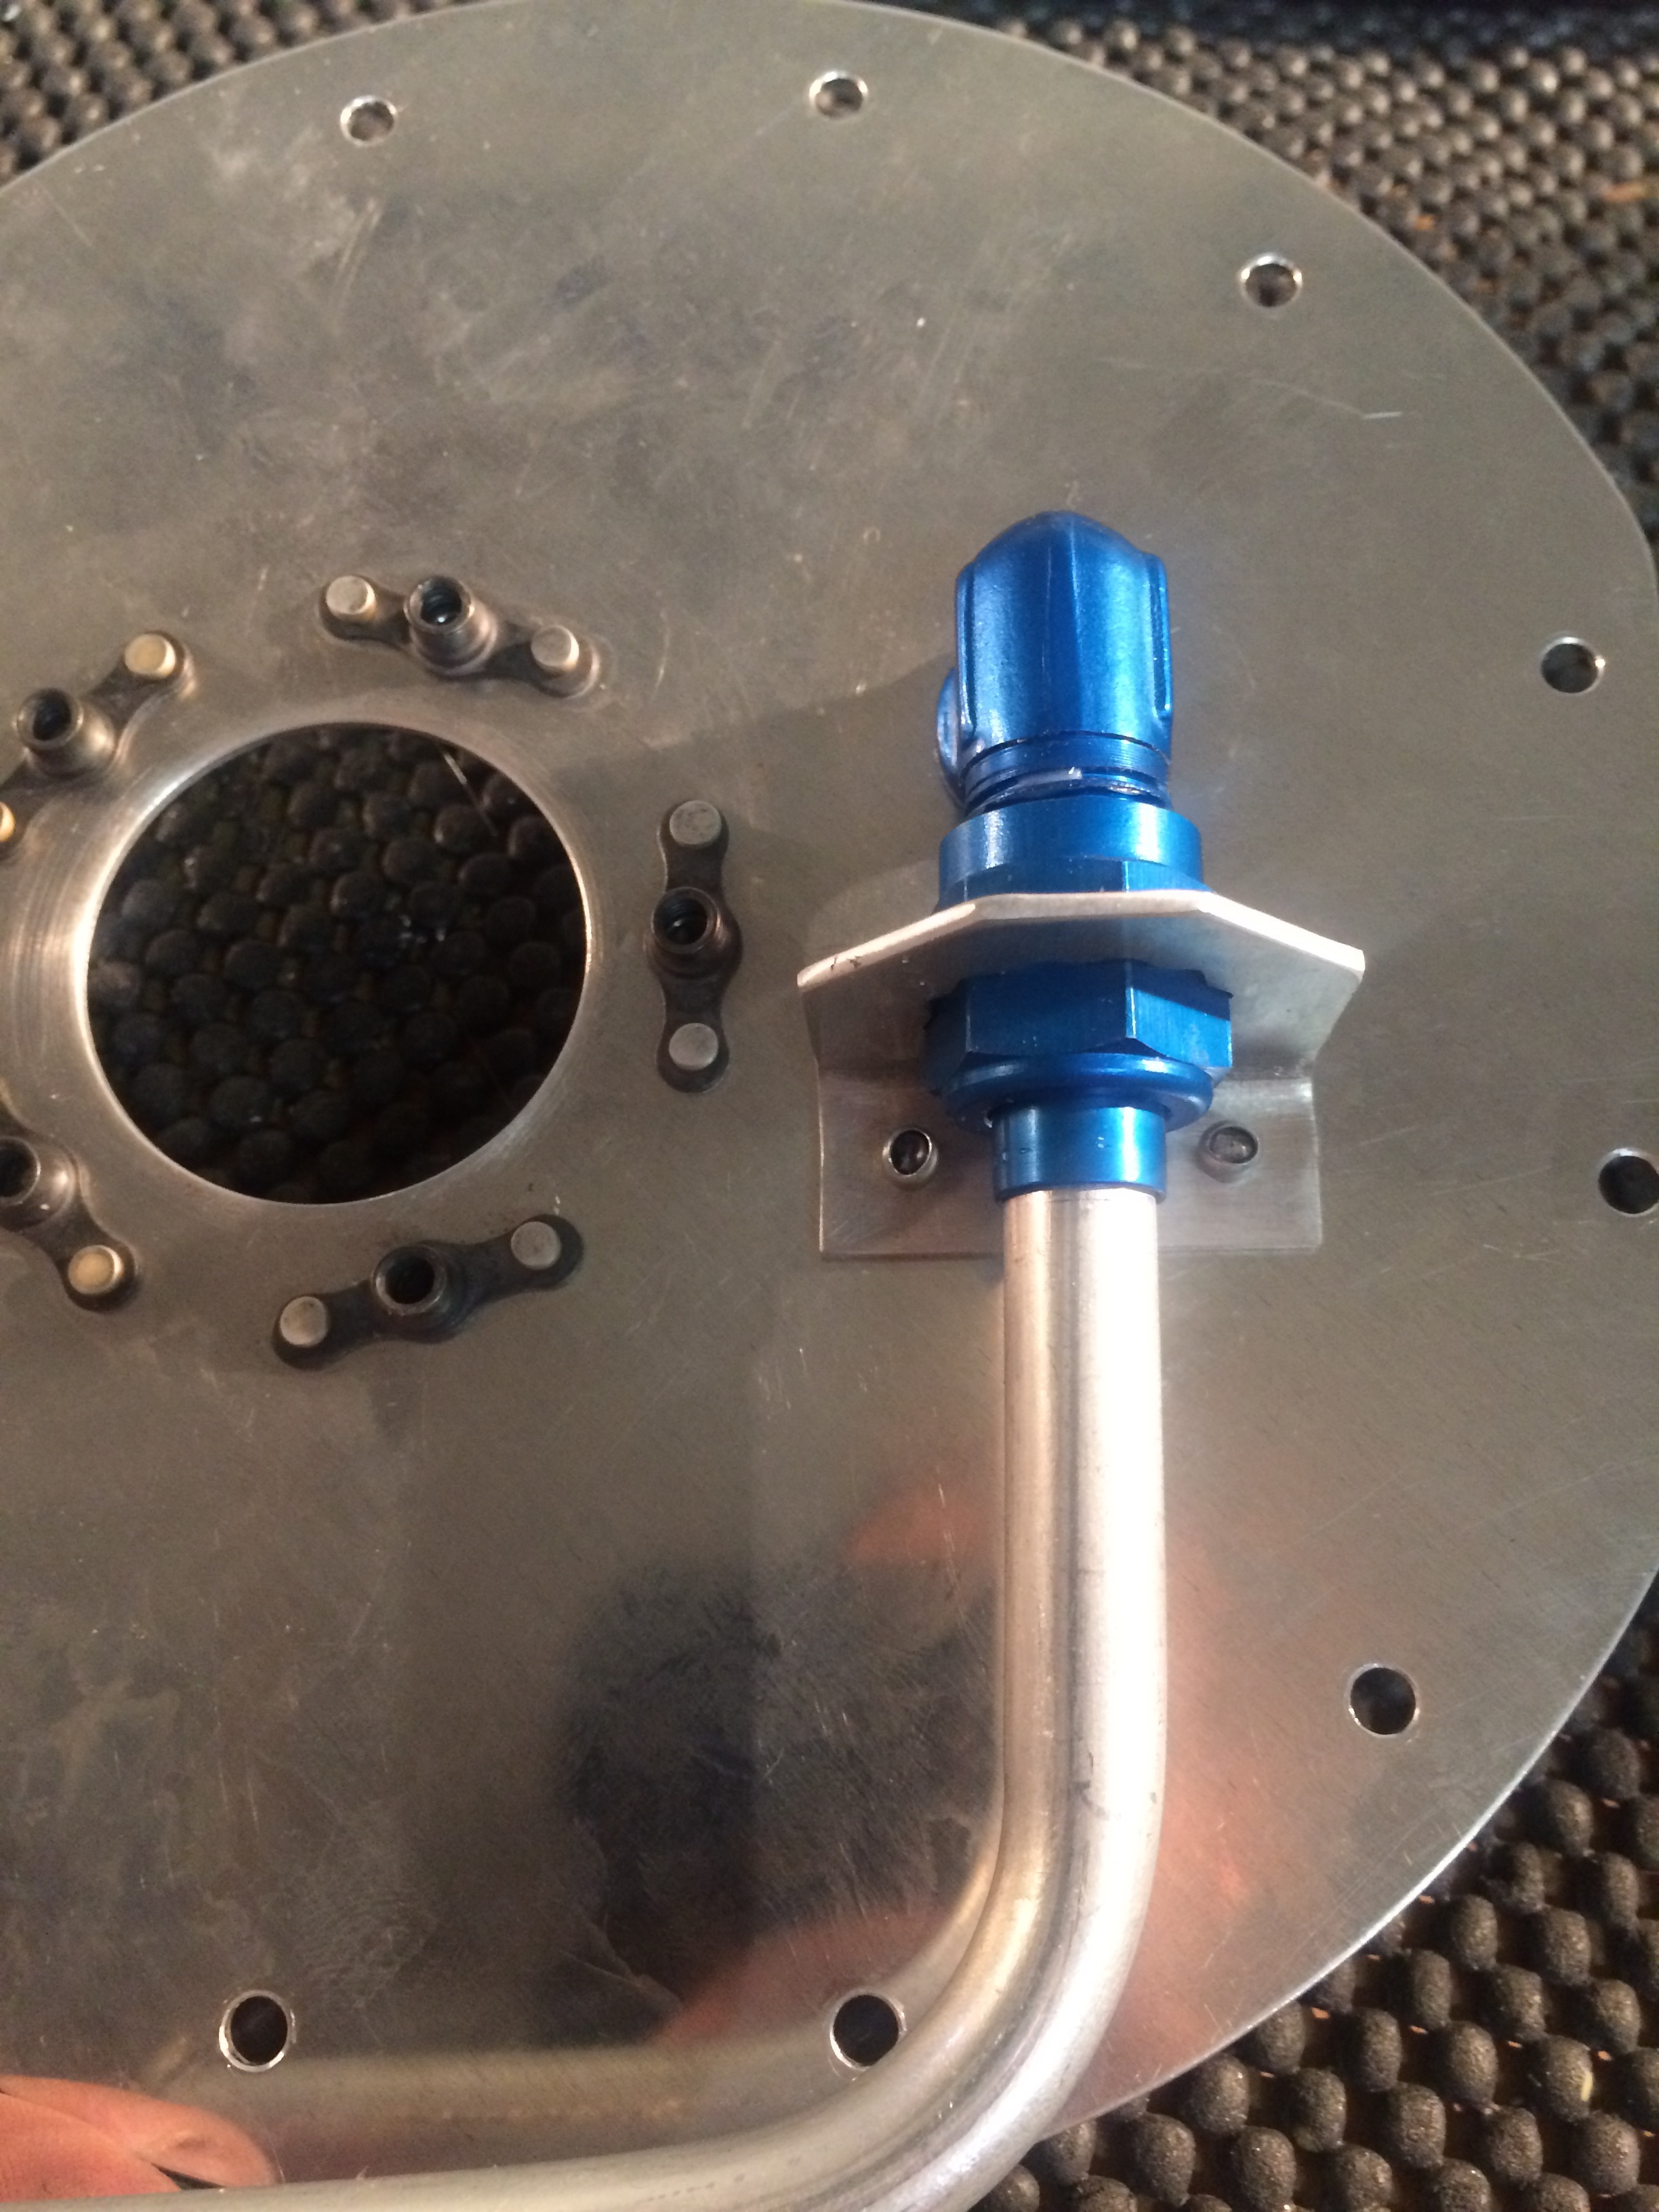
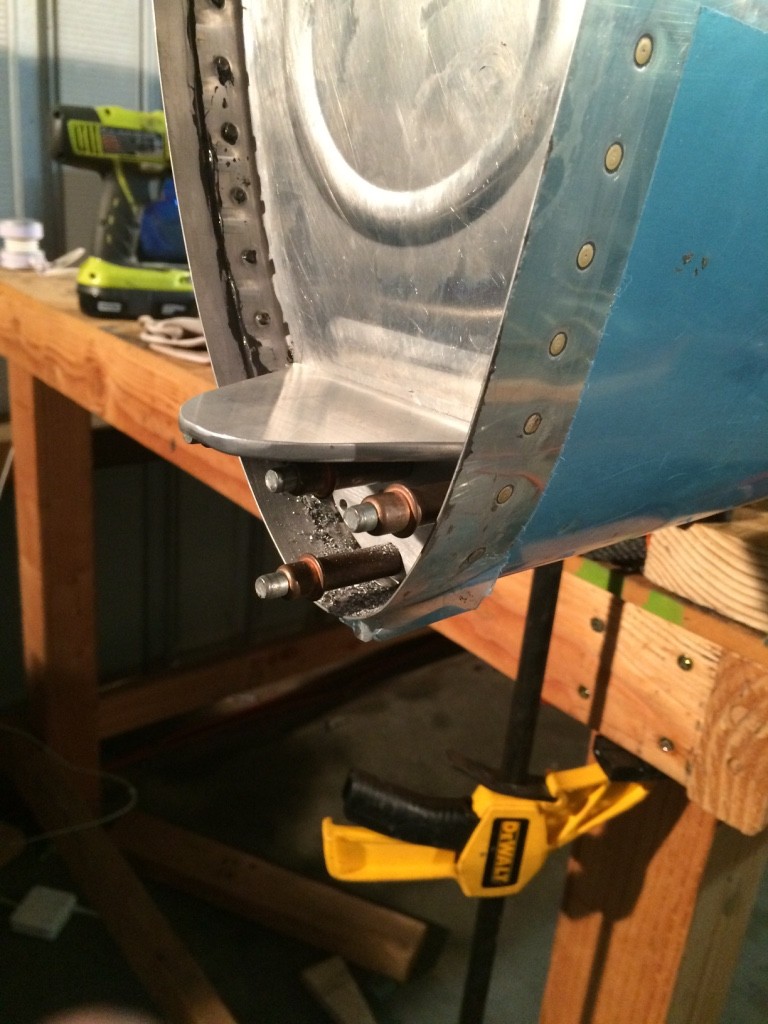
A few weeks back, I ordered a pre-fabricated fuel pickup tube from Van’s. After installing the elbow, I torqued the B-nut to 100 in-lbs. The standard says you should torque the nut between 75-125 in-lbs. Although Van’s tells you to use solid rivets to secure the anti-rotation bracket, I just used blind rivets because I was worried about the bucking bar damaging the tubing.
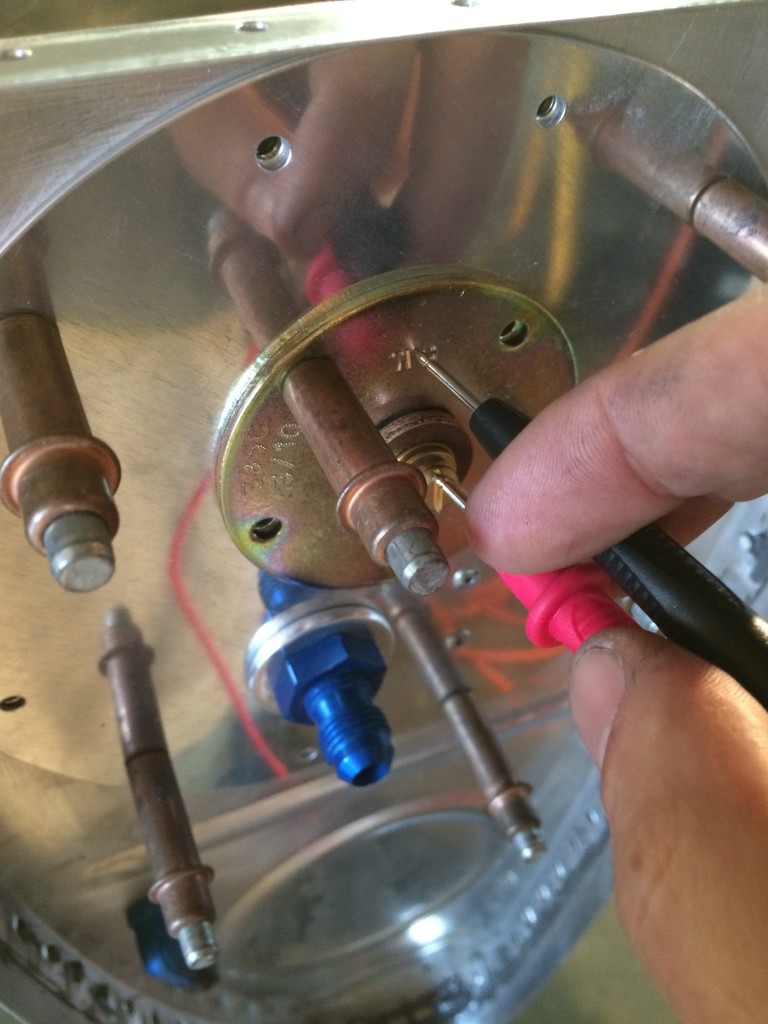
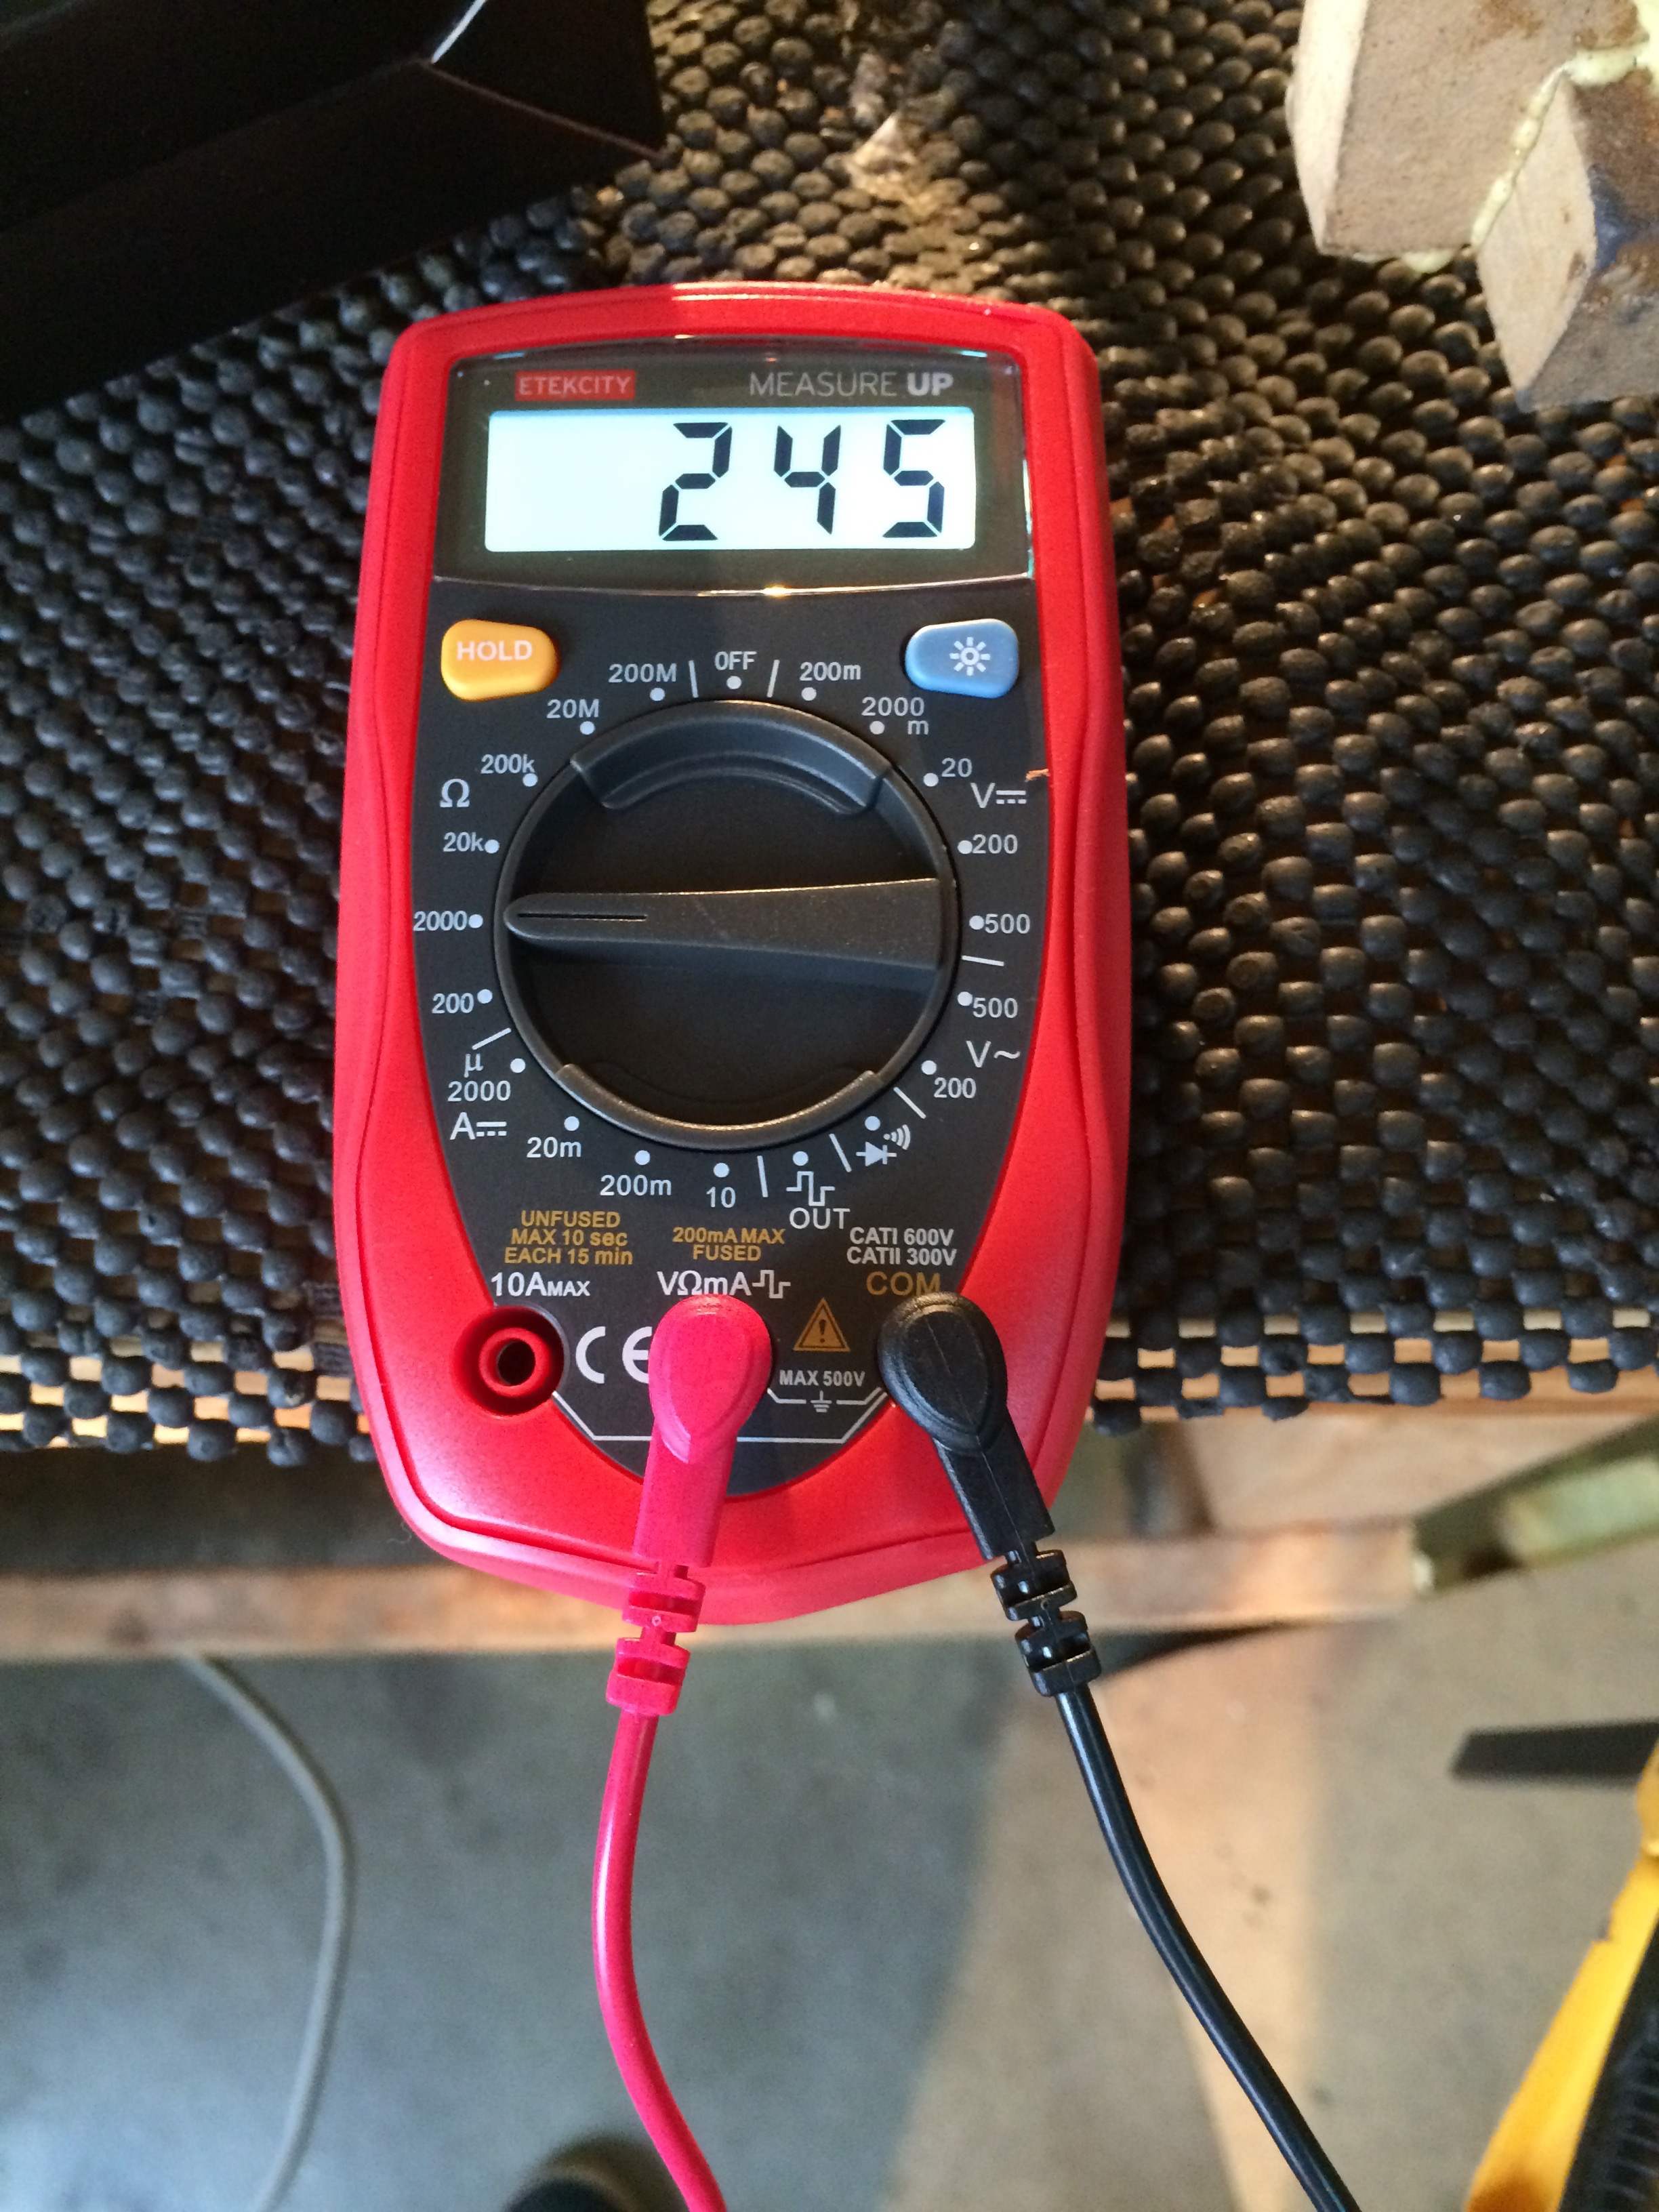
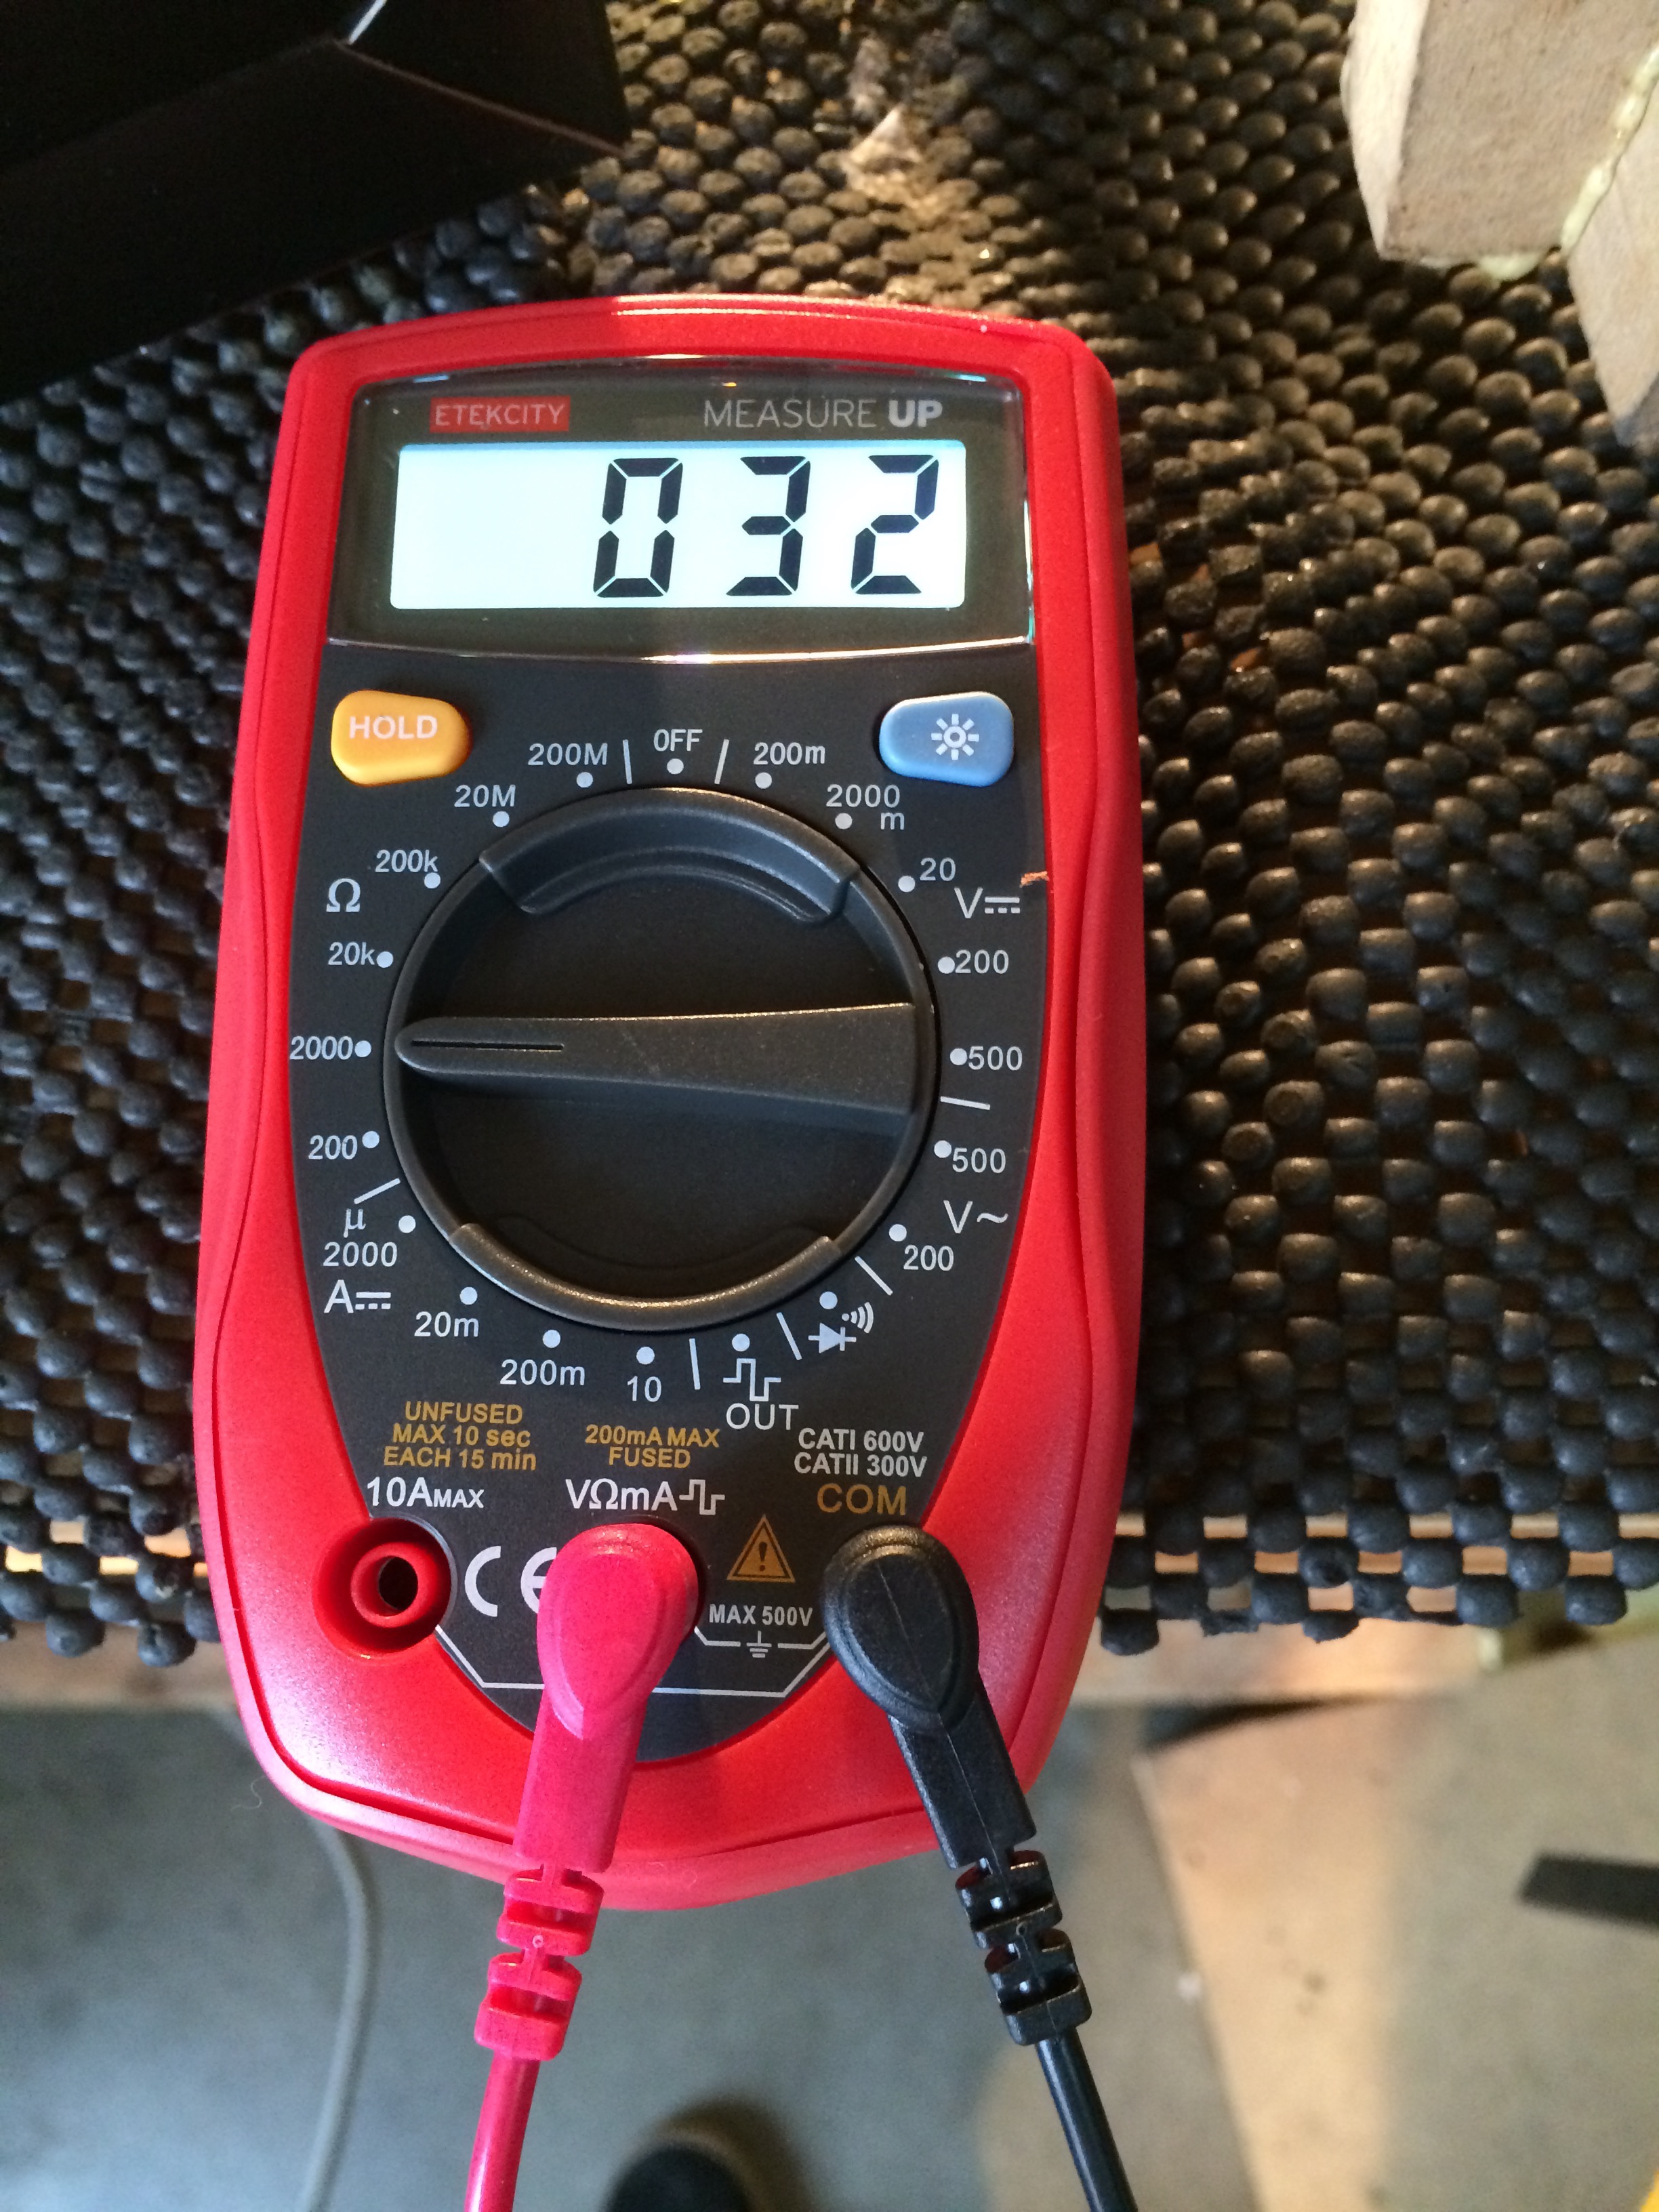
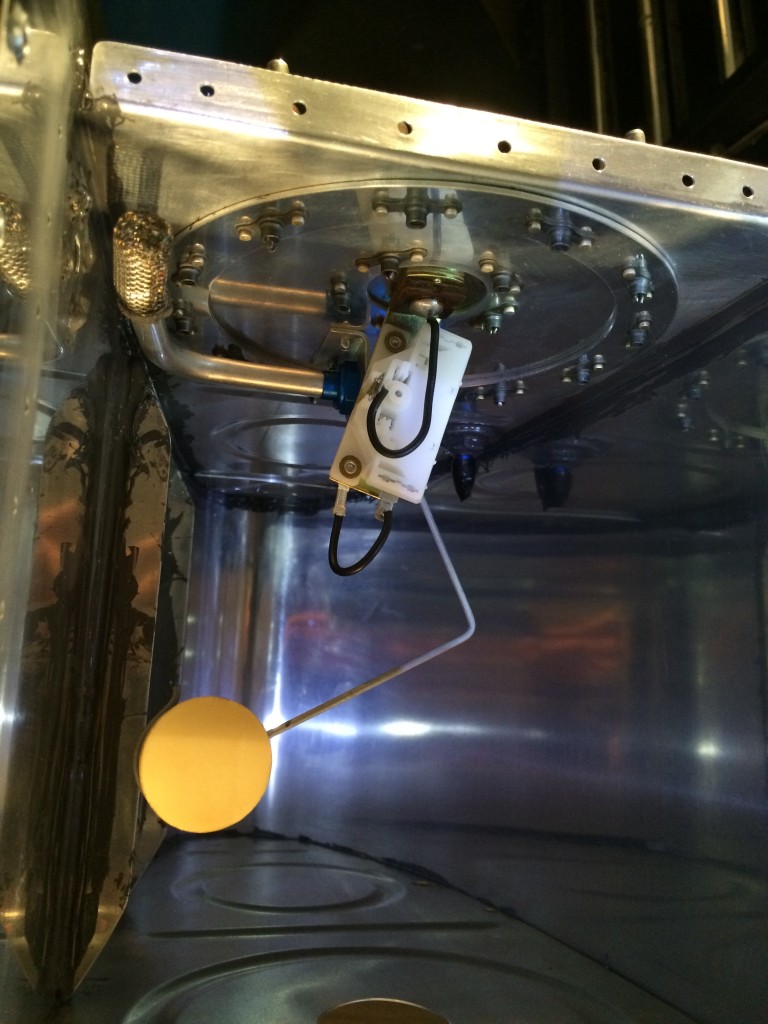
I got the fuel level sensor temporarily installed. I used my new multimeter to ensure the sensor was working properly. At empty and full the multimeter read 245 Ohm and 32 Ohm, respectively. This is inline with what Van’s specifies.
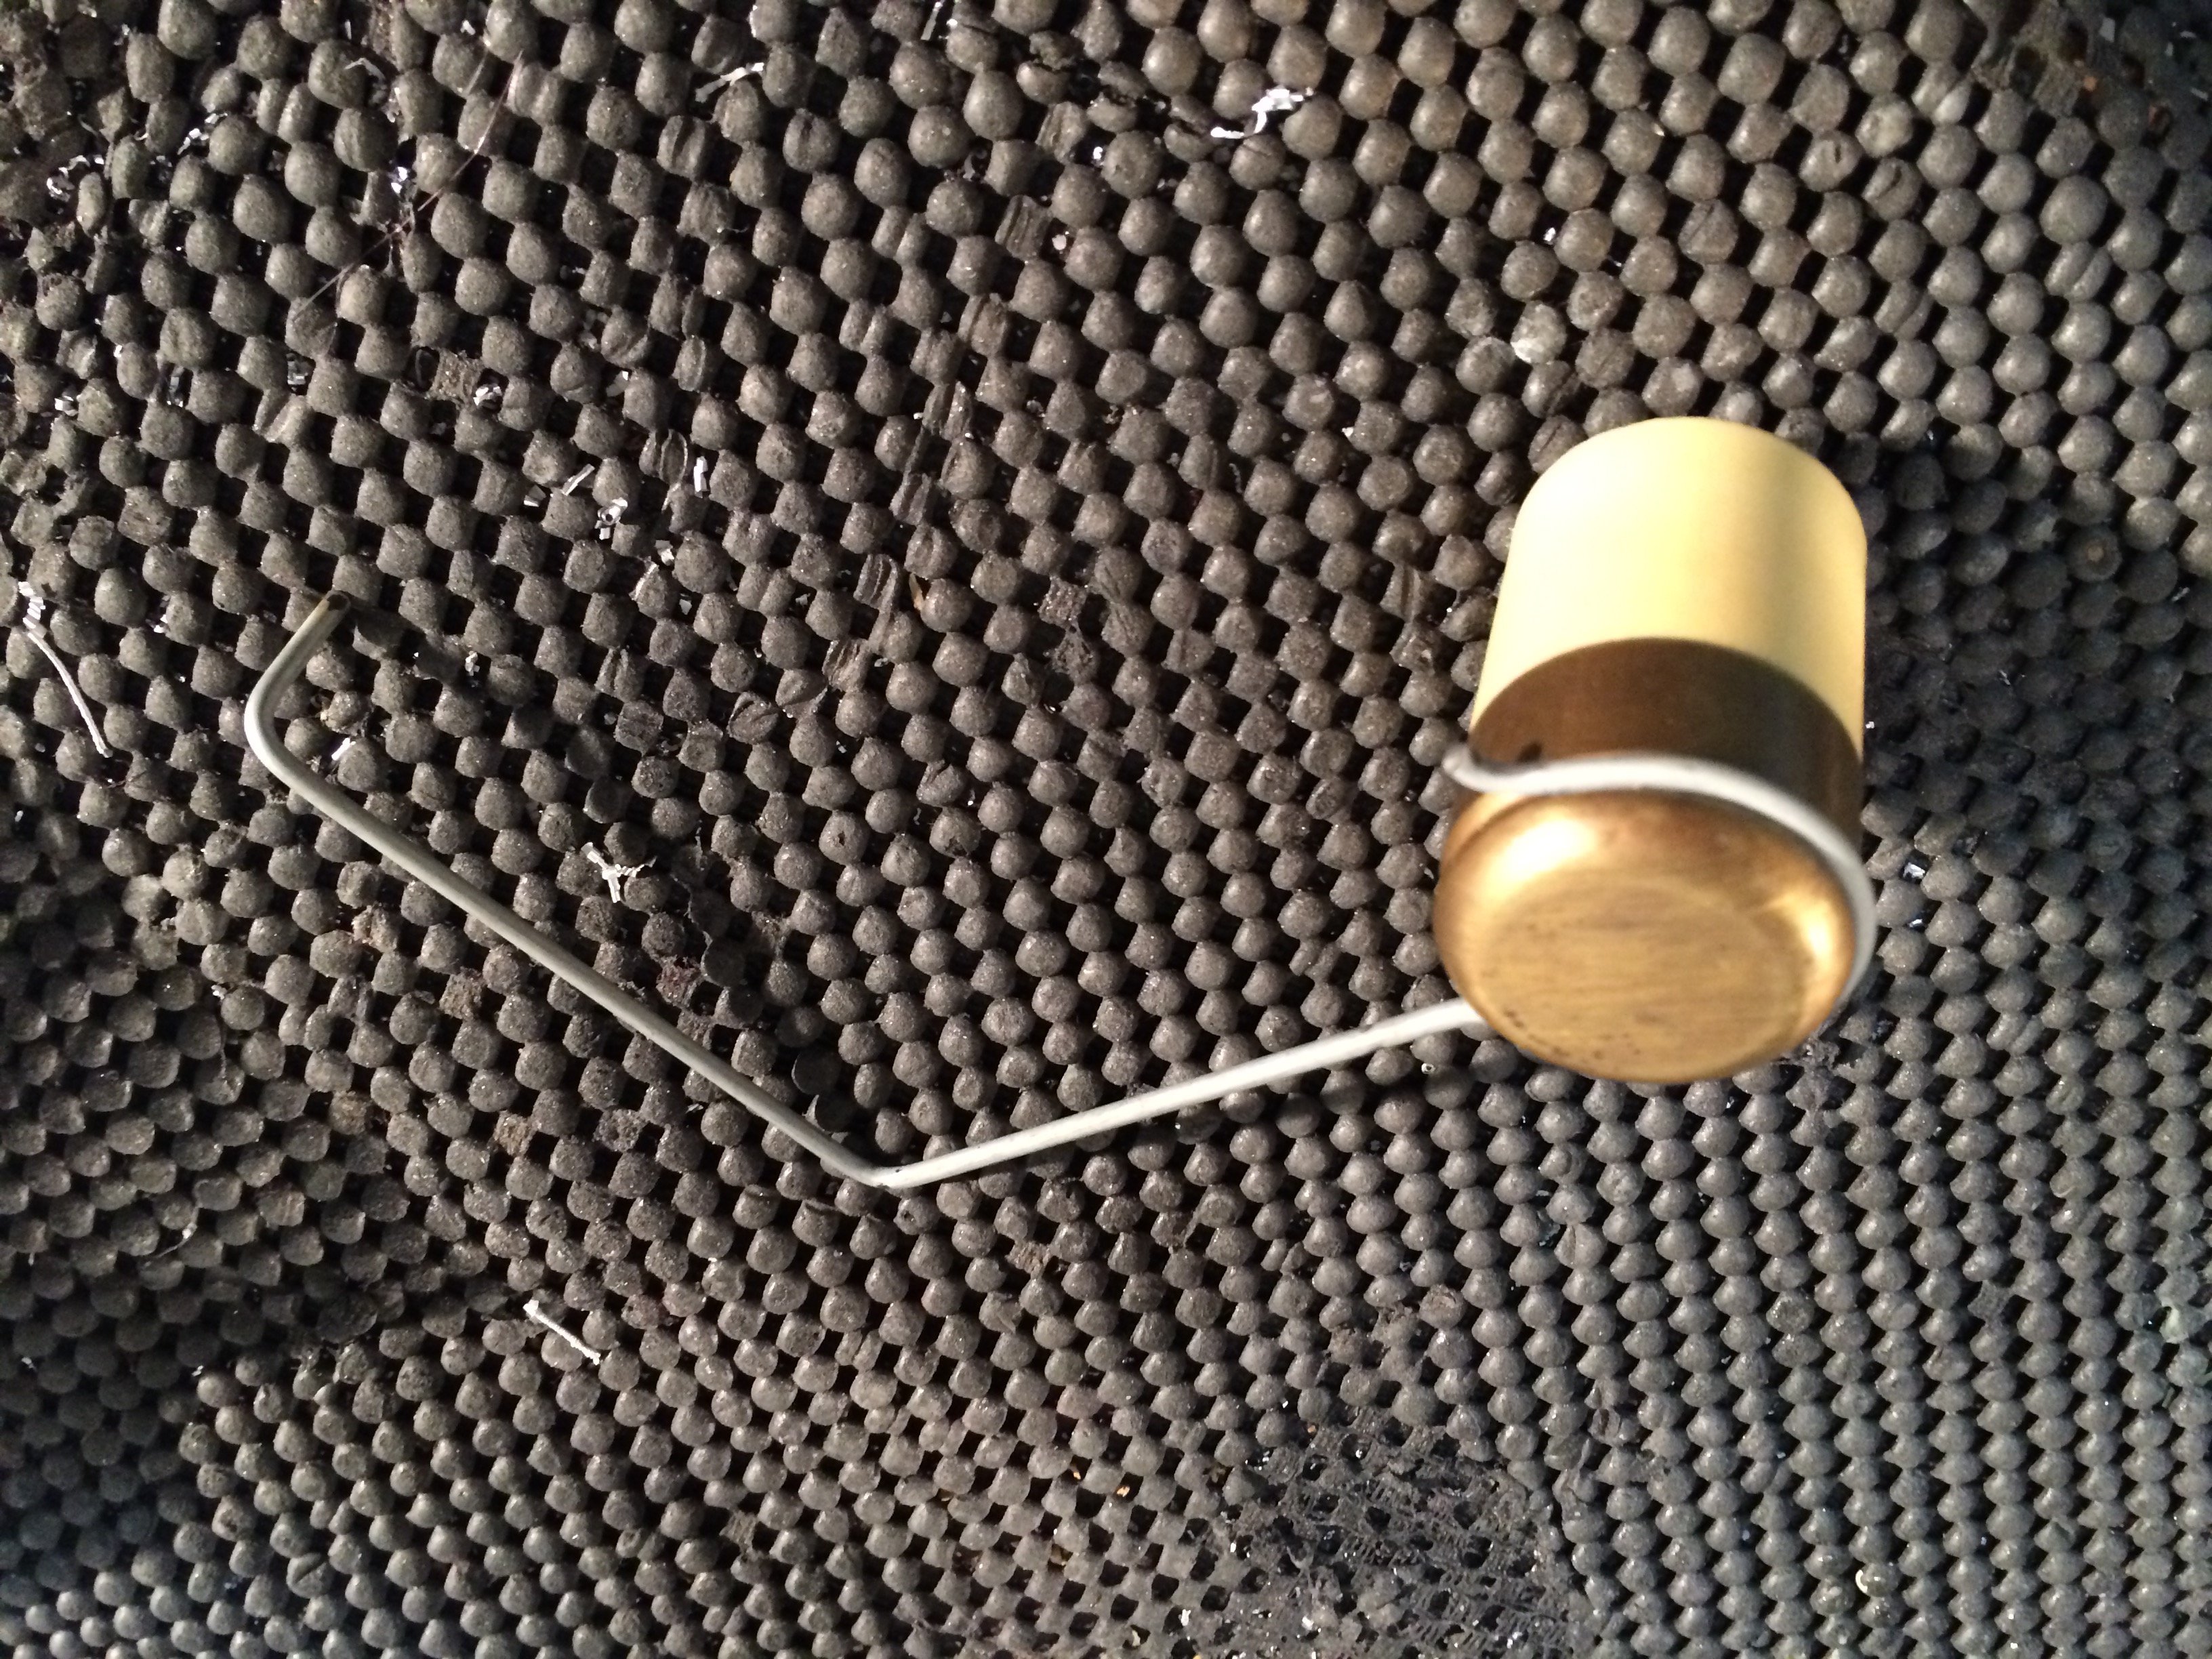
For the float, I bent the wire by holding the part in a drilled 2X4. I used a mallet to deform the wire.
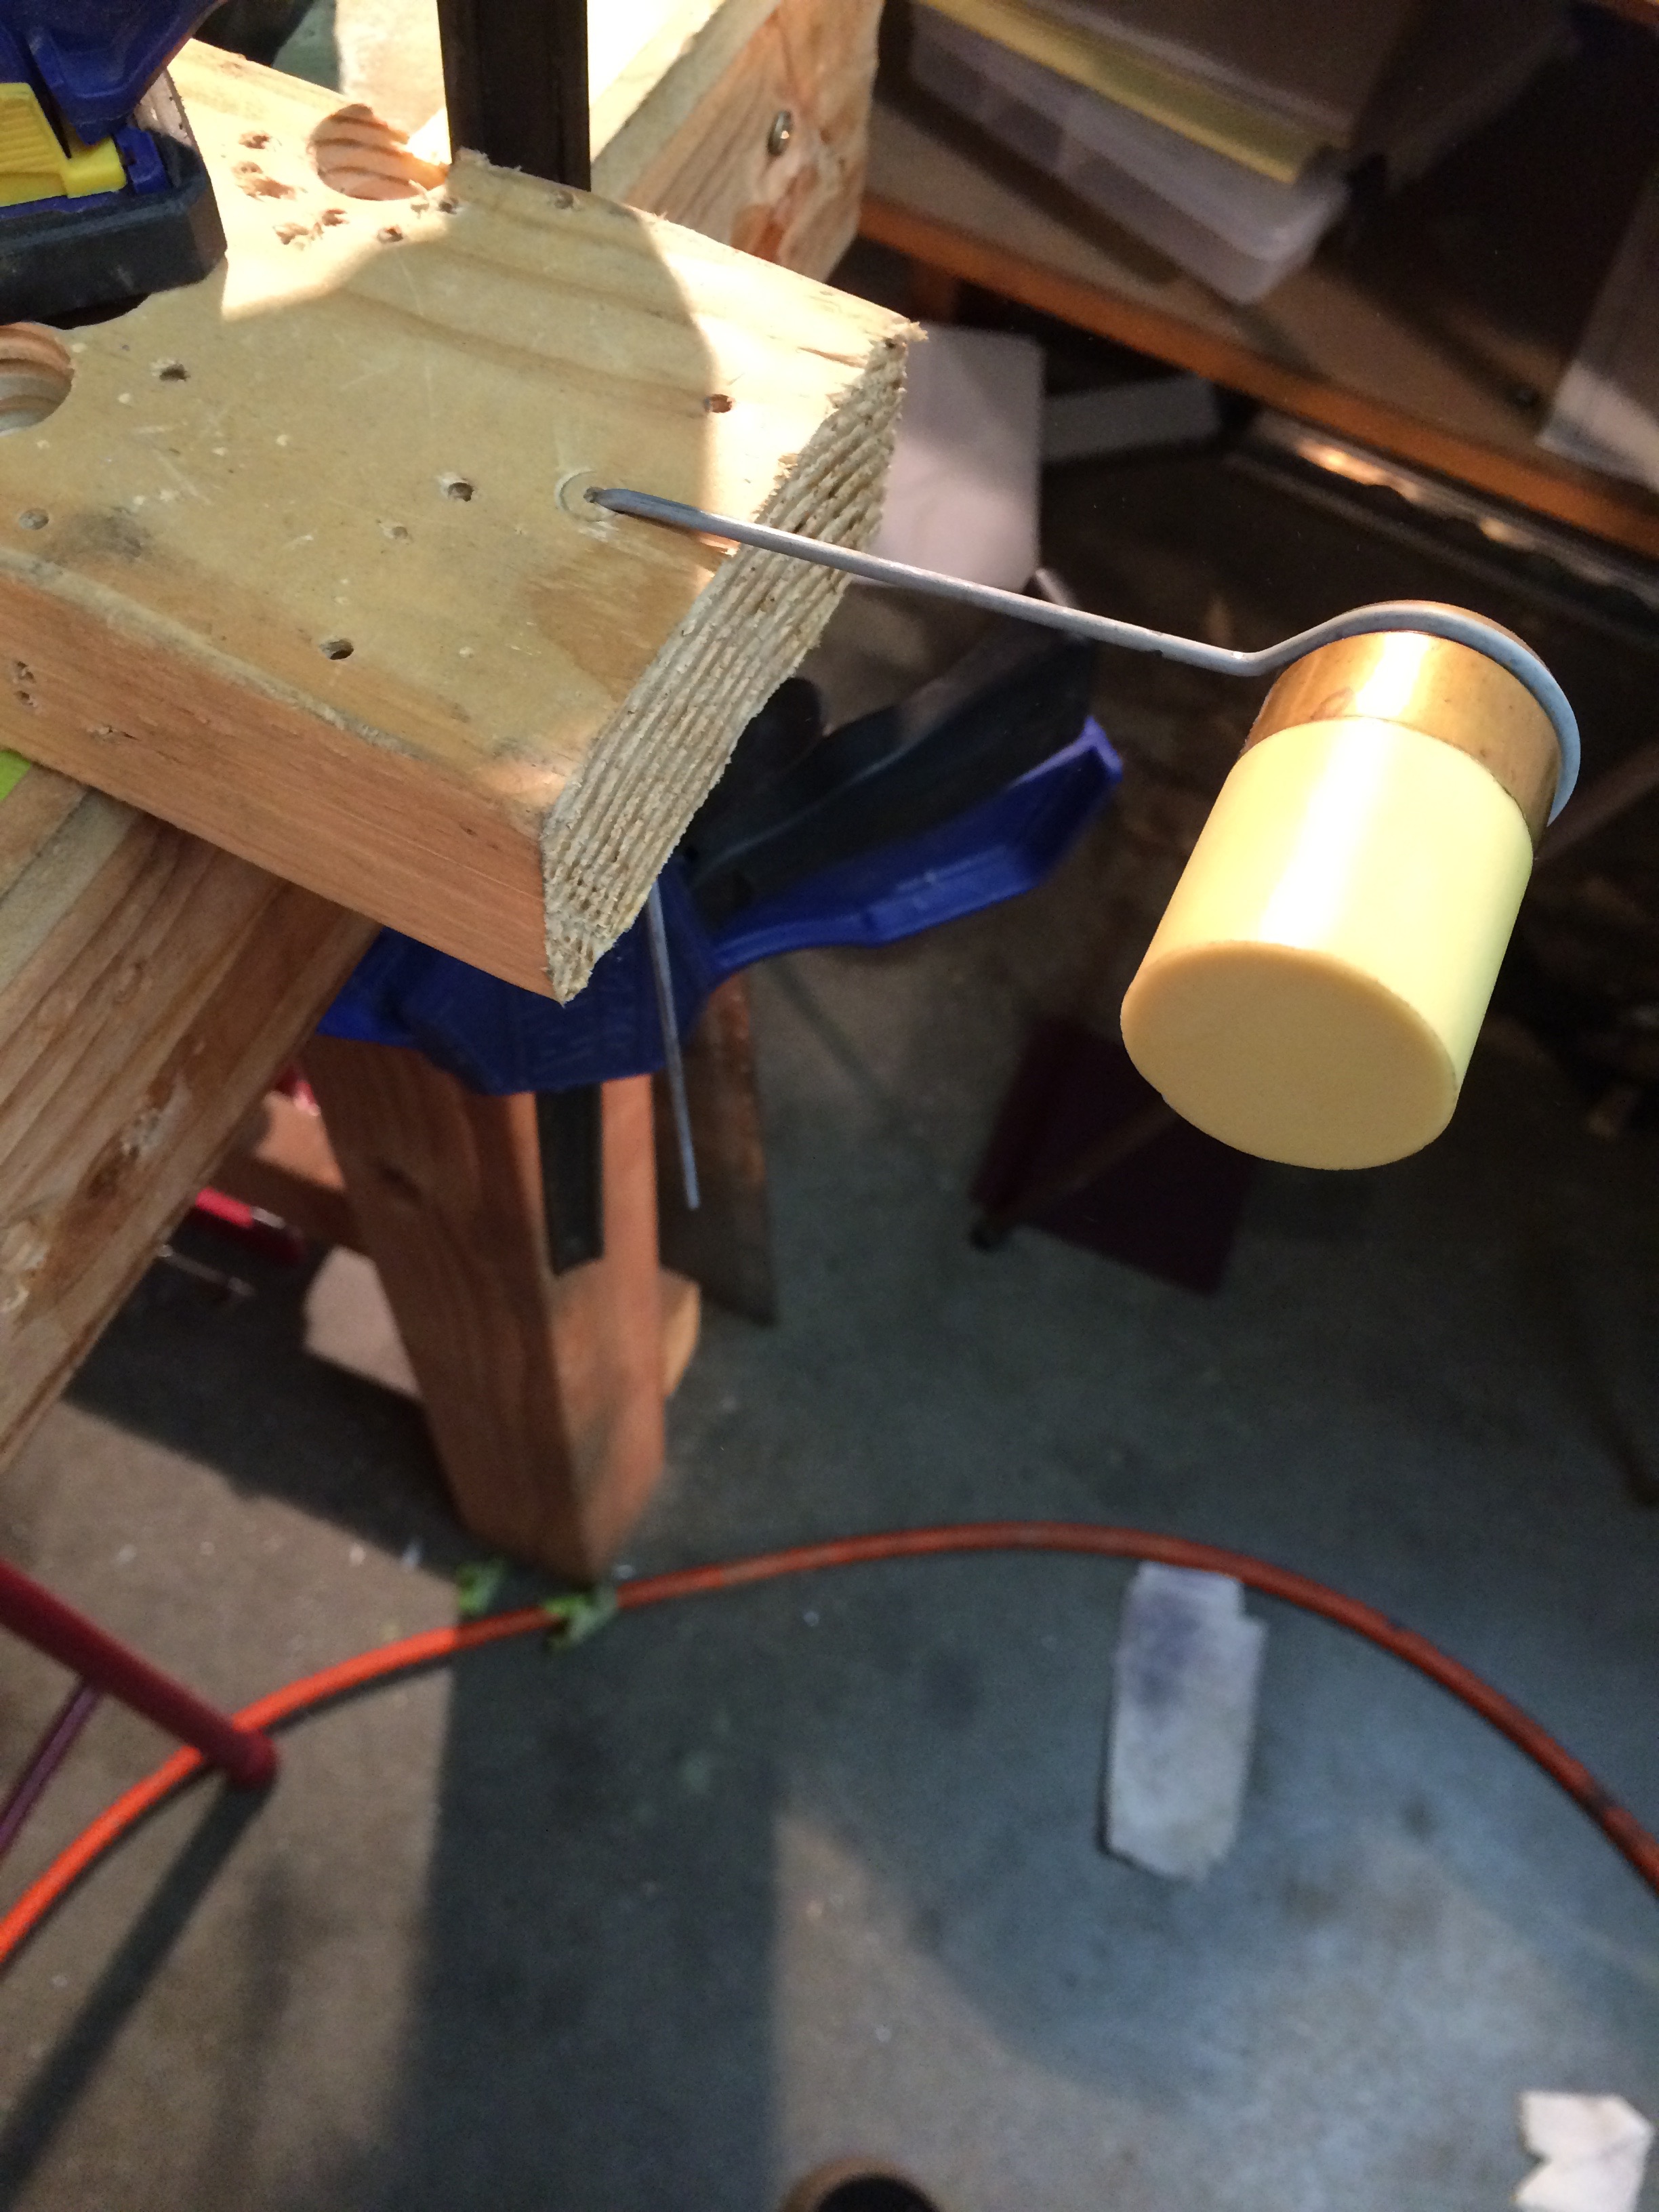
Here’s the bent and cut float.
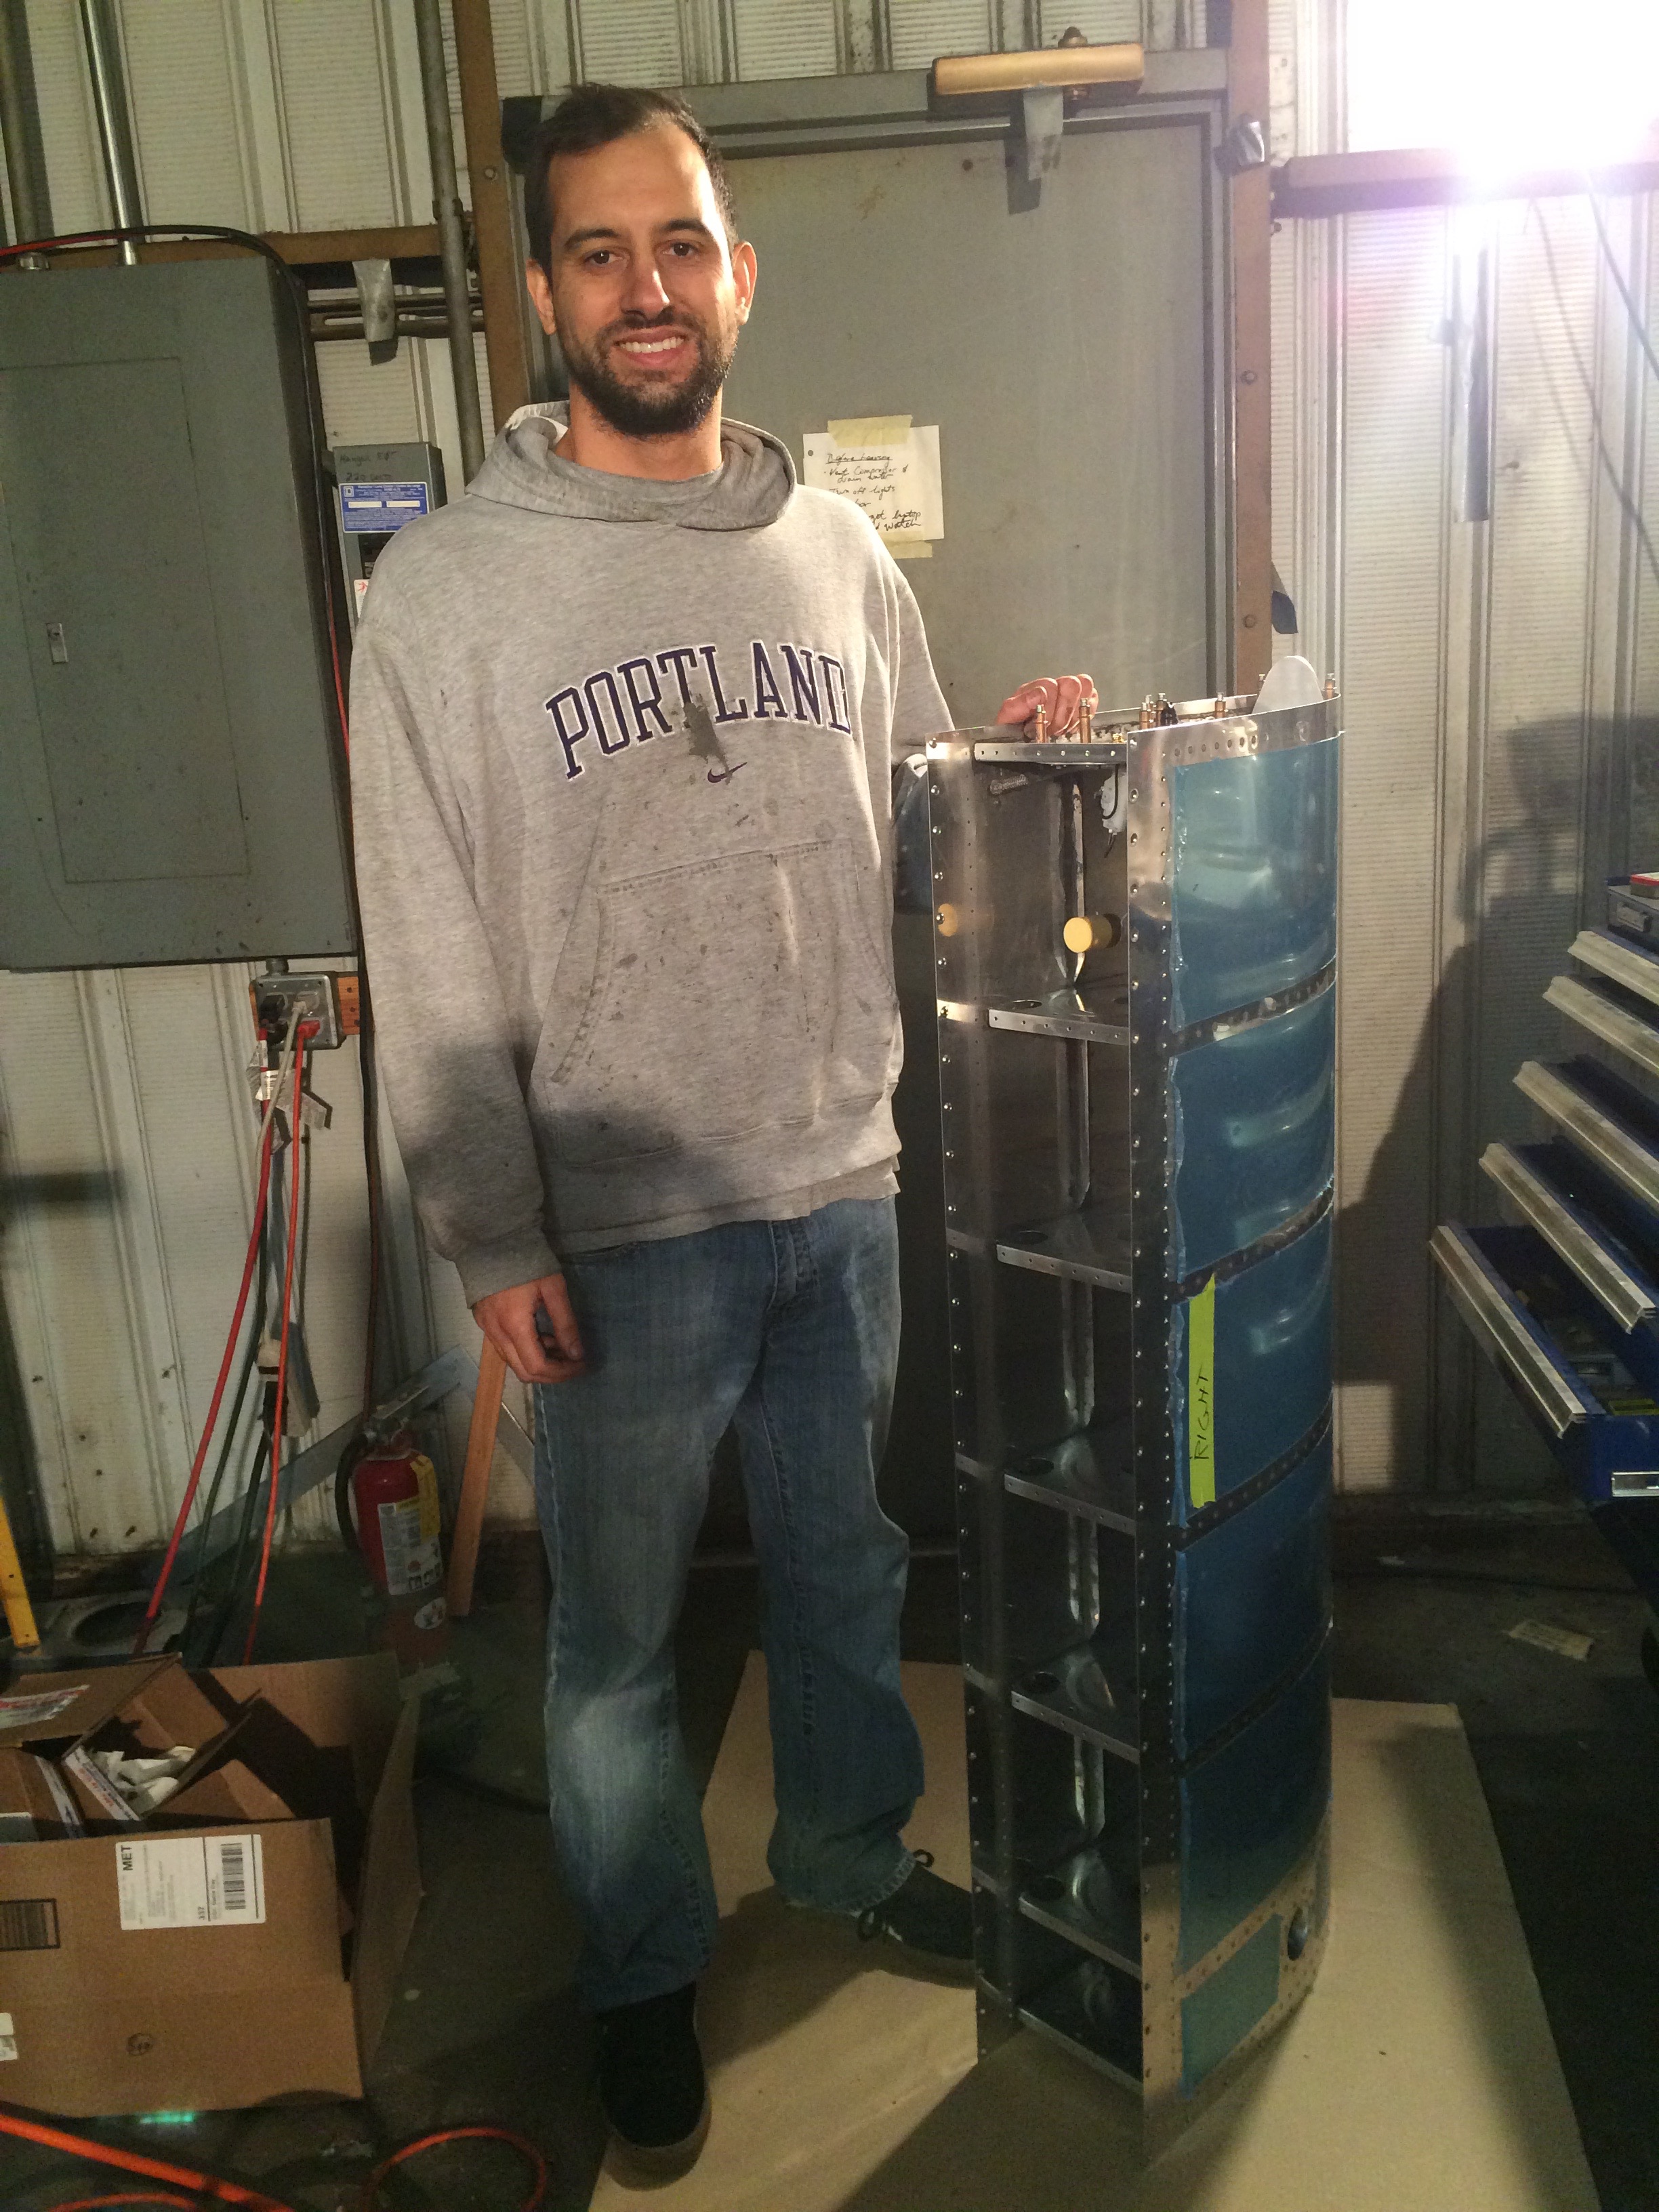
This whole area of the tank is looking really cool.
I sanded down the angle bracket to ensure it does not interfere with the rivets that were installed yesterday. Since some of the holes are getting a little close to the edge of the part, I drilled 3 more rivet holes in the bracket just to be safe.
The last thing I did today was set a rivet in the tooling hole on the outboard rib. This rivet was too large for my pneumatic squeezer so I had to use my rivet gun.
This tank is almost done! The next big task is sealing all the rivets. I’m going to have to toss out this sweatshirt after the tanks are done…